How to Configure LVM (Logical Volume Management) in Oracle Enterprise Linux (OEL)
In previous blog we have seen How to Install OEL 7.7 Click here to read more. And then Upgraded OEL 7.7 to 7.9 Click here to read more. In this blog post we will add new storage hard-disk in Linux Server to store user data. And we will see How to configure LVM (Logical Volume Management) over physical hard disk.
Main benefit of LVM is you can extend or reduce the filesystem as per your requirement without loss of any data and without downtime. When normal Linux partition is full and you need more space in mount point, then normal partition cannot be extended. You have to take a backup of that partition, delete that partition and again create that partition with more disk space, format and mount the partition and then restore that mount point data from the backup. This process requires down time. So this problem can be overcome by LVM. Even you can take Snapshot of Logical Volume and can be Restored if needed.
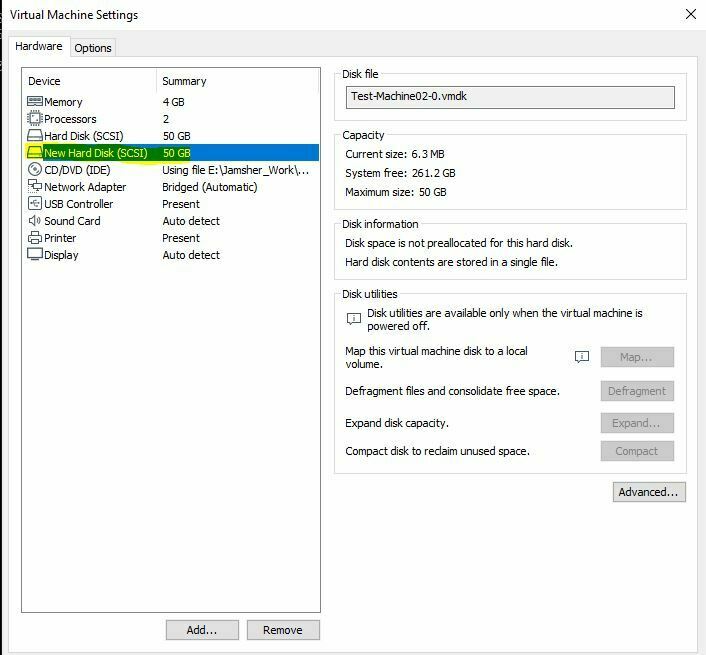
I have added new 50Gb Hard-disk to my VM. We will use this hard disk to create LVM. Reboot your VM machine in order to detect new attached hard disk in VM.
Use command fdisk -l to list the attached hard disk, New Unpartitioned disk /dev/sdb is visible on VM.
[root@test-machine02 ~]# fdisk -l

Disk /dev/sdb: 53.7 GB, 53687091200 bytes, 104857600 sectors
Units = sectors of 1 * 512 = 512 bytes
Sector size (logical/physical): 512 bytes / 512 bytes
I/O size (minimum/optimal): 512 bytes / 512 bytes
Follow below steps to create partition using LVM
- n : add a new partition
- t : change a partition’s system id
- 8e : Hex code for Linux LVM
[root@test-machine02 ~]# fdisk /dev/sdb
Welcome to fdisk (util-linux 2.23.2).

Changes will remain in memory only, until you decide to write them.
Be careful before using the write command.

Device does not contain a recognized partition table
Building a new DOS disklabel with disk identifier 0x4522ec84.

Command (m for help): n
Partition type:
   p   primary (0 primary, 0 extended, 4 free)
   e   extended
Select (default p): p
Partition number (1-4, default 1): 1
First sector (2048-104857599, default 2048):
Using default value 2048
Last sector, +sectors or +size{K,M,G} (2048-104857599, default 104857599):
Using default value 104857599
Partition 1 of type Linux and of size 50 GiB is set

Command (m for help): t
Selected partition 1
Hex code (type L to list all codes): 8e
Changed type of partition 'Linux' to 'Linux LVM'

Command (m for help): w
The partition table has been altered!

Calling ioctl() to re-read partition table.
Syncing disks.
[root@test-machine02 ~]# fdisk -l /dev/sdb

Disk /dev/sdb: 53.7 GB, 53687091200 bytes, 104857600 sectors
Units = sectors of 1 * 512 = 512 bytes
Sector size (logical/physical): 512 bytes / 512 bytes
I/O size (minimum/optimal): 512 bytes / 512 bytes
Disk label type: dos
Disk identifier: 0x4522ec84

   Device Boot      Start         End      Blocks   Id  System
/dev/sdb1            2048   104857599    52427776   8e  Linux LVM
[root@test-machine02 ~]#
Use below command to create Physical Volumes for LVM. Please note /dev/sda2 Hard disk is already partition in LVM during Linux OS installation and used as root directory.
[root@test-machine02 ~]# pvcreate /dev/sdb1
  Physical volume "/dev/sdb1" successfully created.
[root@test-machine02 ~]#
[root@test-machine02 ~]# pvs
  PV         VG Fmt  Attr PSize   PFree
  /dev/sda2  ol lvm2 a--  <49.00g   4.00m
  /dev/sdb1     lvm2 ---  <50.00g <50.00g
Use below command to create vg1 Volume Group, Volume group is the next layer in LVM structure. Basically, volume group contains the physical volumes you created.
[root@test-machine02 ~]# vgcreate vg1 /dev/sdb1
  Volume group "vg1" successfully created
[root@test-machine02 ~]#
[root@test-machine02 ~]# vgs
  VG  #PV #LV #SN Attr   VSize   VFree
  ol    1   2   0 wz--n- <49.00g   4.00m
  vg1   1   0   0 wz--n- <50.00g <50.00g
Use below command to create lvu01_vg1 & lvu02_vg1 Logical Volume each of 15 GB size, Logical Volume is the layer next to volume group in LVM structure. Logical volumes are nothing but block devices created from the volume group. It is a virtual disk partition and can be easily managed using LVM commands.
[root@test-machine02 ~]# lvcreate -L 15g -n lvu01_vg1 vg1
  Logical volume "lvu01_vg1" created.
[root@test-machine02 ~]#
[root@test-machine02 ~]# lvcreate -L 15g -n lvu02_vg1 vg1
  Logical volume "lvu02_vg1" created.
[root@test-machine02 ~]#
[root@test-machine02 ~]# lvs
  LV        VG  Attr       LSize   Pool Origin Data%  Meta%  Move Log Cpy%Sync Convert
  root      ol  -wi-ao---- <45.12g
  swap      ol  -wi-ao----  <3.88g
  lvu01_vg1 vg1 -wi-a-----  15.00g
  lvu02_vg1 vg1 -wi-a-----  15.00g

[root@test-machine02 ~]# lvscan
  ACTIVE            '/dev/ol/swap' [<3.88 GiB] inherit
  ACTIVE            '/dev/ol/root' [<45.12 GiB] inherit
  ACTIVE            '/dev/vg1/lvu01_vg1' [15.00 GiB] inherit
  ACTIVE            '/dev/vg1/lvu02_vg1' [15.00 GiB] inherit
Now we are ready to create filesystem. As we have created two Volume Group lvu01_vg1 & lvu02_vg1, We will create two different filesystem ext4 & xfs. Create u01 & u02 in root directory and mount the filesystem.
[root@test-machine02 ~]# mkfs.ext4 /dev/vg1/lvu01_vg1
mke2fs 1.42.9 (28-Dec-2013)
Filesystem label=
OS type: Linux
Block size=4096 (log=2)
Fragment size=4096 (log=2)
Stride=0 blocks, Stripe width=0 blocks
983040 inodes, 3932160 blocks
196608 blocks (5.00%) reserved for the super user
First data block=0
Maximum filesystem blocks=2151677952
120 block groups
32768 blocks per group, 32768 fragments per group
8192 inodes per group
Superblock backups stored on blocks:
        32768, 98304, 163840, 229376, 294912, 819200, 884736, 1605632, 2654208

Allocating group tables: done
Writing inode tables: done
Creating journal (32768 blocks): done
Writing superblocks and filesystem accounting information: done

[root@test-machine02 ~]#
[root@test-machine02 ~]# mkfs.xfs /dev/vg1/lvu02_vg1
meta-data=/dev/vg1/lvu02_vg1     isize=256    agcount=4, agsize=983040 blks
         =                       sectsz=512   attr=2, projid32bit=1
         =                       crc=0        finobt=0, sparse=0, rmapbt=0, reflink=0
data     =                       bsize=4096   blocks=3932160, imaxpct=25
         =                       sunit=0      swidth=0 blks
naming   =version 2              bsize=4096   ascii-ci=0 ftype=1
log      =internal log           bsize=4096   blocks=2560, version=2
         =                       sectsz=512   sunit=0 blks, lazy-count=1
realtime =none                   extsz=4096   blocks=0, rtextents=0
[root@test-machine02 ~]#
[root@test-machine02 ~]# cd /
[root@test-machine02 /]#
[root@test-machine02 /]# mkdir u01
[root@test-machine02 /]# mkdir u02
[root@test-machine02 /]#
[root@test-machine02 /]# mount /dev/vg1/lvu01_vg1 /u01
[root@test-machine02 /]#
[root@test-machine02 /]# mount /dev/vg1/lvu02_vg1 /u02
[root@test-machine02 /]#
[root@test-machine02 /]# df -Th
Filesystem                Type      Size  Used Avail Use% Mounted on
devtmpfs                  devtmpfs  1.9G     0  1.9G   0% /dev
tmpfs                     tmpfs     2.0G     0  2.0G   0% /dev/shm
tmpfs                     tmpfs     2.0G  9.1M  2.0G   1% /run
tmpfs                     tmpfs     2.0G     0  2.0G   0% /sys/fs/cgroup
/dev/mapper/ol-root       xfs        46G  3.4G   42G   8% /
/dev/sda1                 xfs      1014M  246M  769M  25% /boot
tmpfs                     tmpfs     392M     0  392M   0% /run/user/0
/dev/mapper/vg1-lvu01_vg1 ext4       15G   41M   14G   1% /u01
/dev/mapper/vg1-lvu02_vg1 xfs        15G   33M   15G   1% /u02
Click here for Step by Step Install Oracle Enterprise Linux (OEL) 7
Click here for How to Upgrade Oracle Enterprise Linux (OEL) 7.7 to 7.9
Click here for How to Extend and Reduce LVM (Logical Volume Management)
Click here for Step by Step manually creation of an Oracle 19c Database on Linux 7
This document is just for learning purpose and always validate in the LAB environment first before applying in the LIVE environment.
Hope so you like this article!
Please share your valuable feedback/comments/subscribe and follow us below and don’t forget to click on the bell icon to get the most recent update. Click here to understand more about our pursuit.
![]()