How to Enable 64bit option in Oracle Virtual Machine while OS Installation on Windows

Here we are going to demonstrate how to enable 64bit option in Oracle virtual machine (VM) while installing an operating system (OS). This issue may persist due to the VIRTUALIZATION option is DISABLED in BIOS especially when we configure a new machine or after reset of an existing machine or reinstall OS.
In our case, we were preparing a new VM on a new Windows 10 machine and found after install of Oracle VM software, 64bit option was not available for any of the available OS at the time of adding the machine to Oracle VM application.
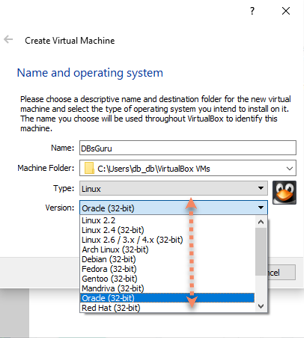
Follow Below steps to enable 64bit option In Oracle VM while add machine.
Step:1 To reach this option first, we have to enable Virtualization in BIOS.
1.1 To start Windows in BIOS, we can use function key F2 to F10. Most of the SYSTEMS support function key F2, follow the system’s provided option.
OR
Follow the below option if you are not confident in using the function key:
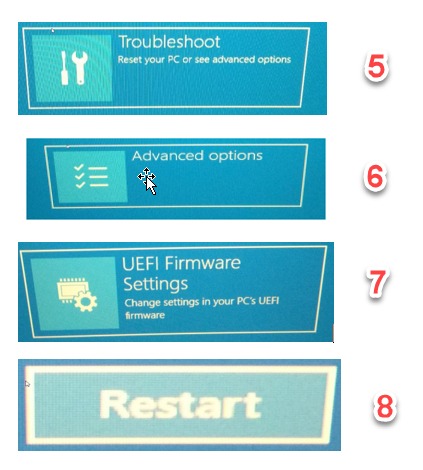
Click on Settings >> Update & Security >> Recovery >> Advanced start-up >> Restart now >> Troubleshoot >> Advanced Options >> UEFI Firmware Settings >> Restart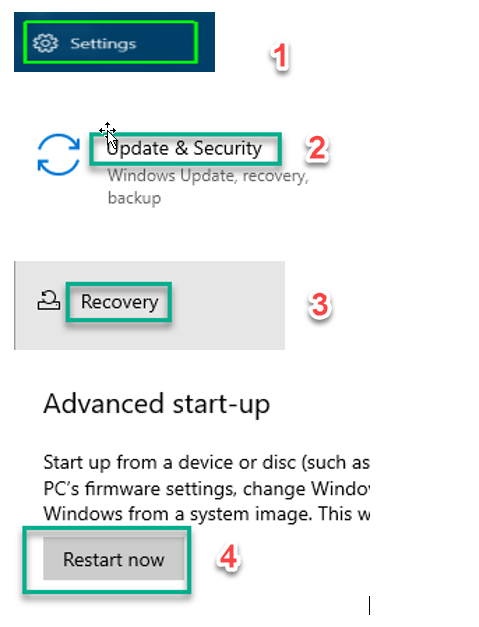
Step2: Once you reach BIOS, go to Advance and look for Virtualization. In our case, it’s under CPU Configuration. It may differ on other machines, depends on the BIOS manufacturer.

Step3: Click on CPU Configuration and find for Virtualization then select Enabled.
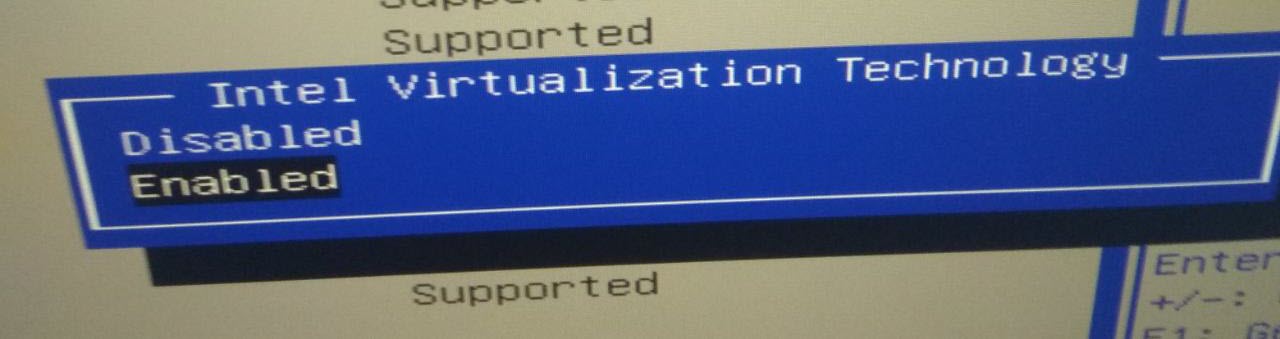
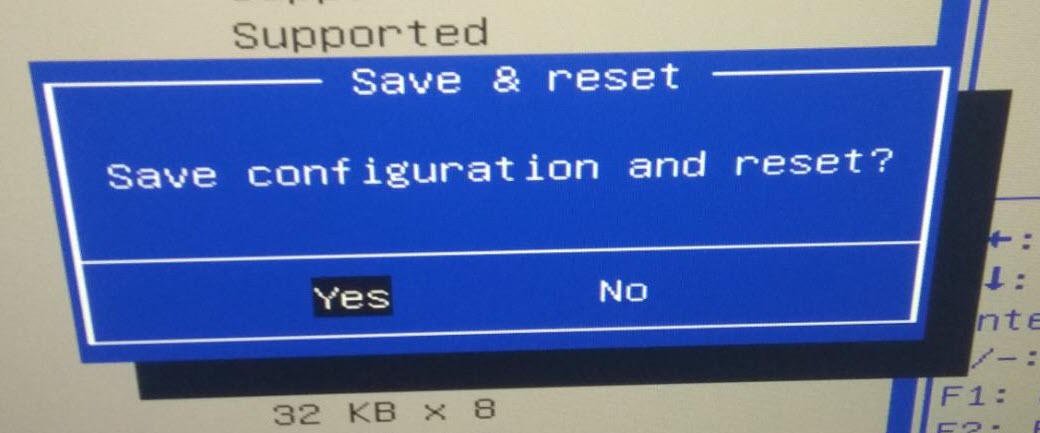
Step4: To Save & reset, click on Yes and come out (Restart) from BIOS.
Step5: Now finally start Oracle VM application and try to add a new machine (OS) and we can see 64bit options are available.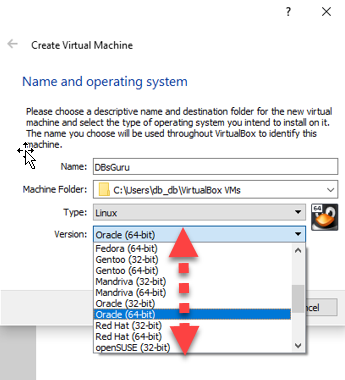
Click here for Step by Step Install Oracle Enterprise Linux (OEL) 7
Click here for How to Upgrade Oracle Enterprise Linux (OEL) 7.7 to 7.9
Click here for Step by Step manually creation of an Oracle 19c Database on Linux 7
This document is only for learning purpose and always validate in the LAB environment first before applying in the LIVE environment.
Hope so you like this article!
Please share your valuable feedback/comments/subscribe and follow us below and don’t forget to click on the bell icon to get the most recent update. Click here to understand more about our pursuit.
![]()