Step by Step Apply Patch ODA X7-2M from 18.3 to 18.8
In this article, we are going to demonstrate step by step to apply the server patch on ODA (Oracle Database Appliance) X7-2M from 18.3 to 18.8 i.e upgrade ODA version from 18.3 to 18.8. To apply the server patch on Oracle Database Appliance (ODA). We must have to download the latest patches and update the repository.
Follow the below steps to apply patches Oracle Database Appliances (ODA). Here we shared maximum screenshots of the command’s output.
Step1:- Login to My Oracle Support and Download ODA server patch for ODACLI/DCS stack patch ID 30518425 as mentioned below and move it from your local machine to the ODA server on the desire location.
p30518425_188000_Linux-x86-64_1of2.zip
p30518425_188000_Linux-x86-64_2of2.zip
Step2:- Unzip the server patch files:
# unzip p30518425_188000_Linux-x86-64_1of2.zip
# unzip p30518425_188000_Linux-x86-64_2of2.zip
Once you unzip both patch files, it contains readme document along with below two zip files:
oda-sm-18.8.0.0.0-200124-server1of2.zip
oda-sm-18.8.0.0.0-200124-server2of2.zip
Step3:- Update Patch repository.
# odacli update-repository -f /kvm_repos/oda_patch/oda-sm-18.8.0.0.0-200124-server1of2.zip,/kvm_repos/oda_patch/oda-sm-18.8.0.0.0-200124-server2of2.zip
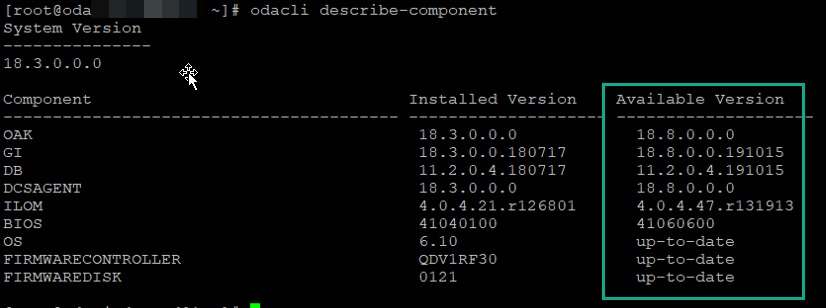
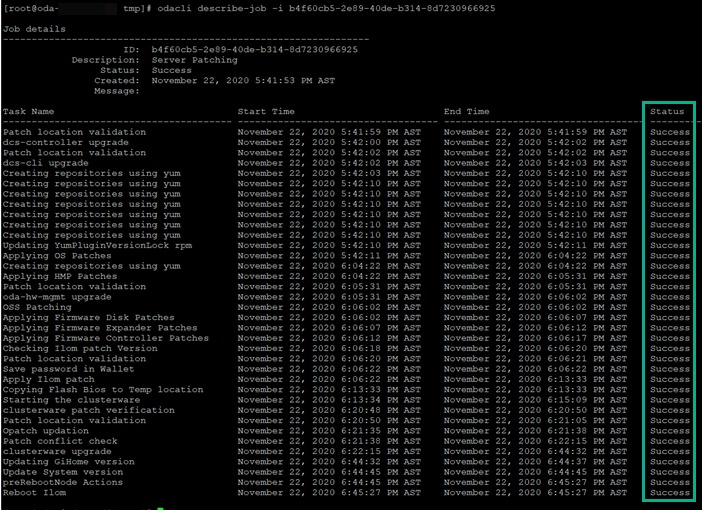
Step4:- Validate the repository update, it should be successful and a new patch is available:
# odacli describe-job -i <job id>
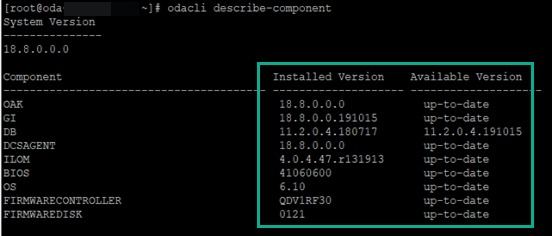
# odacli describe-component
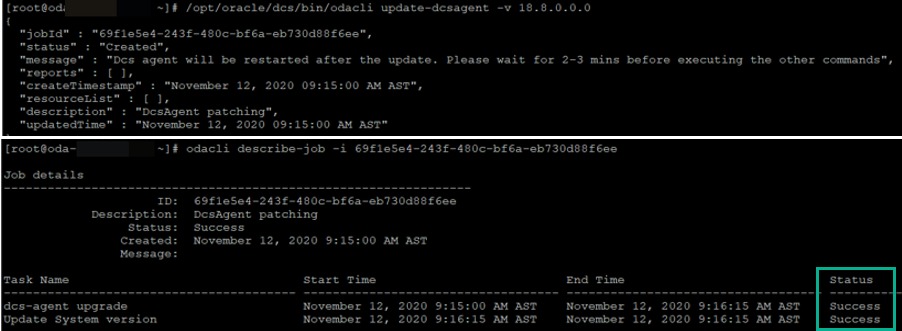
Step5:- Update DCS agent to 18.8 Version along with job validation after update.
# odacli update-dcsagent -v 18.8.0.0.0
# odacli describe-job -i <job id>
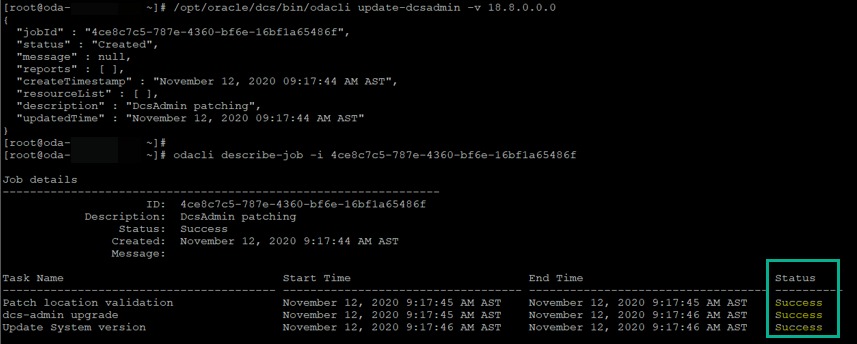
Step6:- Update DCS admin to 18.8 Version along with job validation after update.
# odacli update-dcsadmin -v 18.8.0.0.0
# odacli describe-job -i <job id>
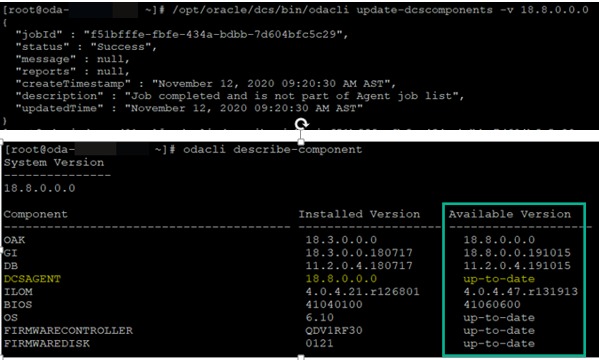
Step7:- Update DCS components to 18.8 Version along with job validation after update
# odacli update-dcscomponents -v 18.8.0.0.0
# odacli describe-job -i <job id>
# odacli describe-component
Step8:- Create Prepatch report to identify potential error that may cause of patching activity failure along with validate status of Prepatch report.
# odacli create-prepatchreport -s -v 18.8.0.0.0
# odacli describe-job -i <job id>
Step9:- Review prepatch report and STATUS should be SUCCESS before moving to the next step.
# odacli describe-prepatchreport -i <job id>
Step10:- Execute update-server command, here preferred to run from ODA-VCN session instead from system putty.
# odacli update-server -v 18.8.0.0.0
Step11:- Monitor the job.
# odacli describe-job -i <job id>
# tail -f /opt/oracle/dcs/log/dcs-agent.log.
Step12:- Wait for a system reboot. Once the Server is up validate for patch components.
# odacli describe-component
Step13:- Update Patch Storage components to 18.8 Version along with job validation.
# odacli update-storage -v 18.8.0.0.0
# odacli describe-job -i <job id>
A big Thanks to Jamsher for applying the ODA patch and captured output. Click here to know more about him.
This document is only for learning purpose and always validate in the LAB environment first before applying in the LIVE environment.
Hope so you like this article!
Please share your valuable feedback/comments/subscribe and follow us below and don’t forget to click on the bell icon to get the latest update. Click here to know more about our pursuit.
Related Articles
- Oracle Critical Database Patch ID for January 2025 along with enabled Download Link
- Oracle Critical Database Patch ID for October 2024 along with enabled Download Link
- Oracle Critical Database Patch ID for July 2024 along with enabled Download Link
- Oracle Critical Database Patch ID for April 2024 along with enabled Download Link
- Oracle Critical Database Patch ID for January 2024 along with enabled Download Link
![]()


