Step by Step Oracle 19c Binary Installation and Database Creation On Linux

This article is a continuation of the previous article where we have completed prerequisite and binary installation for 19c on Linux 8, click here to read more about it. In this article, we are going to demonstrate Part 2 database creation Step by Step Oracle19c (19.3) enterprise edition binary Installation and database Creation On Linux 8.3 (OEL) using GUI mode which will be on a multitenant architecture (CDB & PDB). We will complete this article in three parts.
1. Prechecks / Prerequisite {Completed in Part 1}
2. Oracle 19c binary installation (runInstaller) {Completed in Part 1}
3. Oracle database creation (DBCA)
3. Oracle database creation (DBCA)
3.1. Set up environment variables: Add below entry in .bash_profile resides in user oracle home directory. In our demonstration it resides on /home/oracle.
export TMP=/tmp
export TMPDIR=$TMP
export ORACLE_HOSTNAME=DBsGuruN3.labdomain
export ORACLE_UNQNAME=labcdb01
export ORACLE_BASE=/u02/app/oracle
export ORACLE_HOME=$ORACLE_BASE/product/19c/db_1
export ORACLE_SID=labcdb01
export PATH=/usr/sbin:$PATH
export PATH=$ORACLE_HOME/bin:$PATH
export LD_LIBRARY_PATH=$ORACLE_HOME/lib:/lib:/usr/lib
export CLASSPATH=$ORACLE_HOME/jlib:$ORACLE_HOME/rdbms/jlib
3.2. Execute environment variables: Here we can execute the environment variables command or go to $ORACLE_HOME/bin to execute the dbca command.
[oracle@DBsGuruN3 ~]$ export ORACLE_HOME=/u02/app/oracle/product/19c/db_1
[oracle@DBsGuruN3 ~]$ export PATH=$ORACLE_HOME/bin:$PATH
[oracle@DBsGuruN3 ~]$ which dbca
/u02/app/oracle/product/19c/db_1/bin/dbca
[oracle@DBsGuruN3 ~]$ dbca
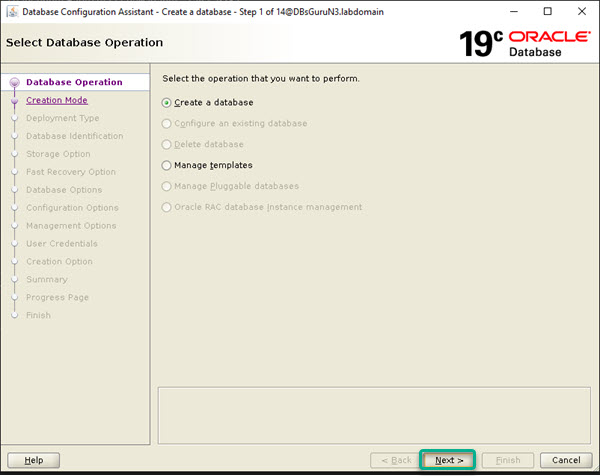
3.3. Launch database creation assistant tool: Once you execute dbca, we can see dbca launched a screen and on the first screen, all options are disabled Create database and Manage template, since we are creating the first database for specific ORACLE_HOME. Select option Create a database and click on Next.
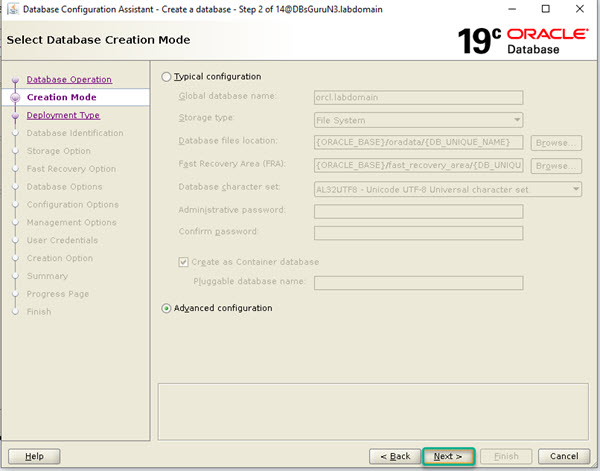
3.4. Creation Mode: In this screen select Advanced configuration to opt for available options like character set, memory, DB files, container, etc. according to your requirements.
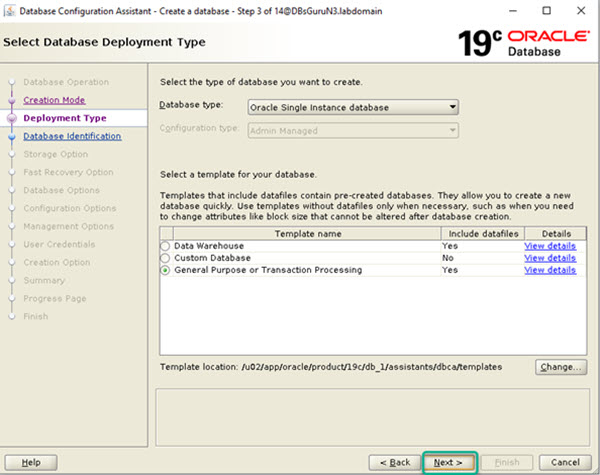
3.5. Deployment Type: In this screen, select Database type: Oracle Single Instance database and Template name: General Purpose then click on Next.
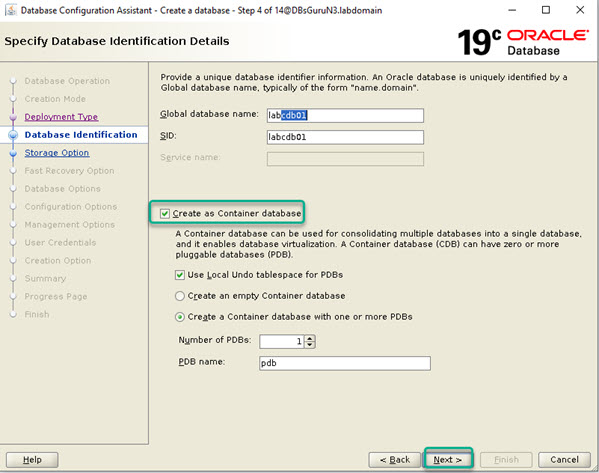
3.6. Database identifier: Pass the value of Global database name / SID along with the opt-in container database with one PDB and click on Next.
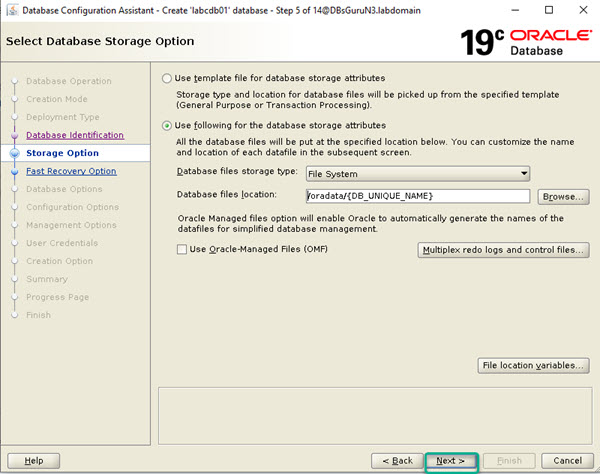
3.7. Storage Option: If you want to create DB files in your desired location then select the second option and browse the directory location, now click on Next.
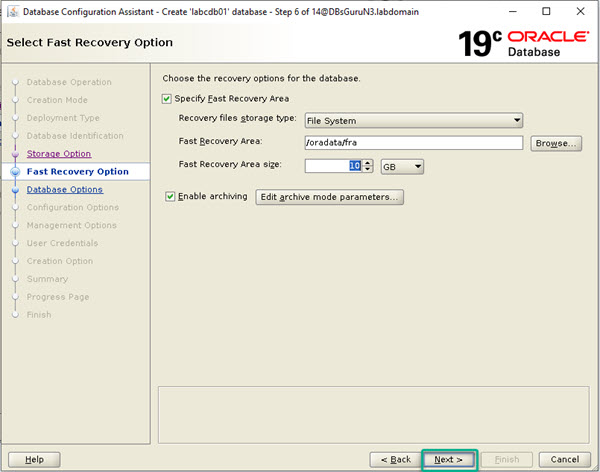
3.8. Fast Recovery Option: In this section, specify an archive location, size of FRA, and opt-in eenable archive. If you don’t want to enable archive then simply uncheck all boxes. Now click on Next.
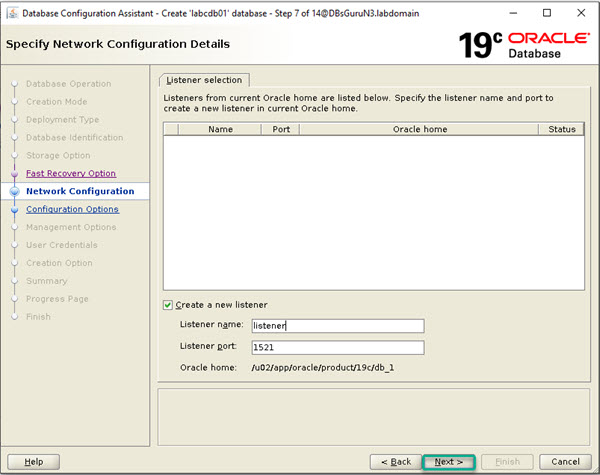
3.9. Network Configuration: Specify a listener name along with a port number. If you want to create a non-default listener or dedicated listener for the database then provide the listener name and port according to that.
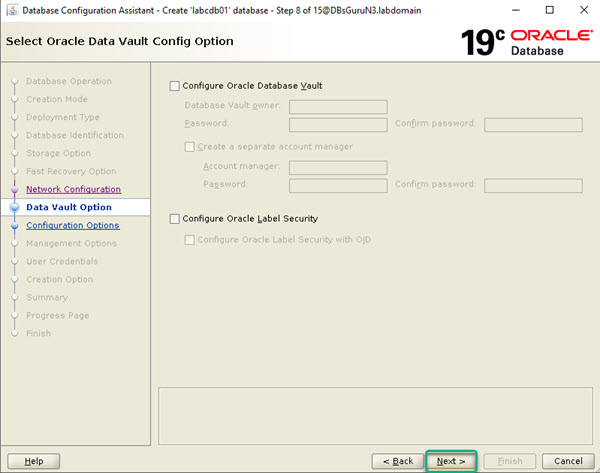
3.10. Database Vault Option: Skip this screen if don’t want to use Database Vault configuration i.e remain to uncheck boxes.
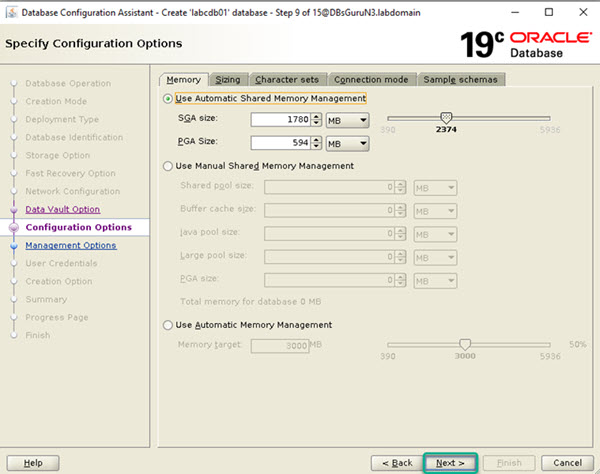
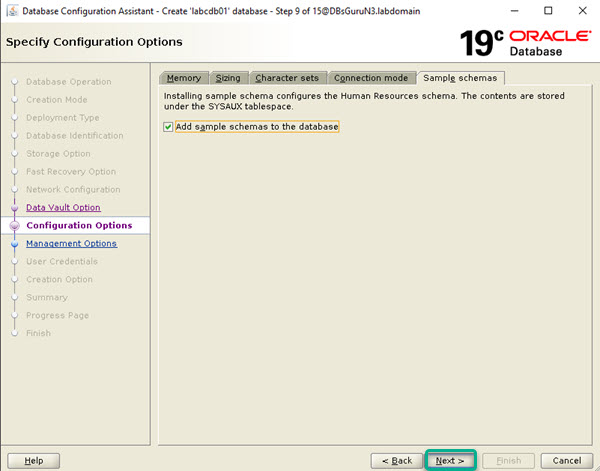
3.11. Configuration options: In this screen, we will click on each tab and do configuration as required.
Memory: Go with either Option-01 Automatic Shared Memory (allocate SGA & PGA) or Option-03 Automatic Memory Management (Memory target).
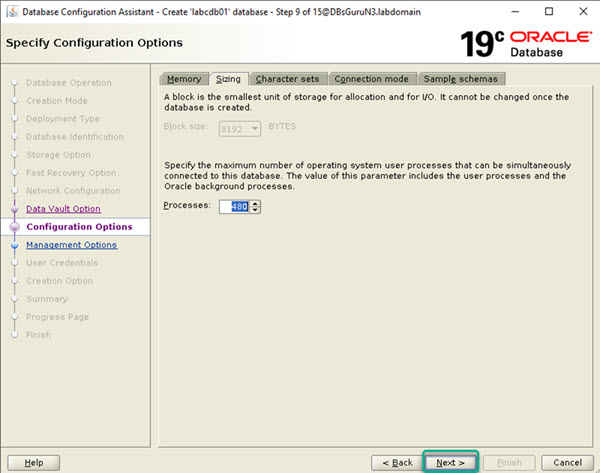
Sizing: Allocate value of parameter Processes, the default value is 480.
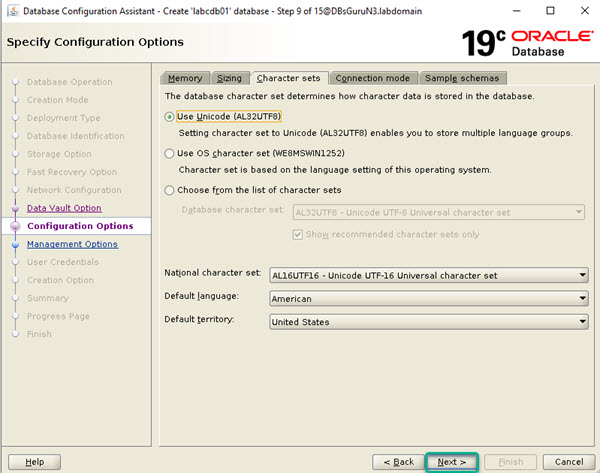
Character sets: Select here AL32UTF8 which supports multiple language groups. If any constraints/dependencies then go with your requirements.
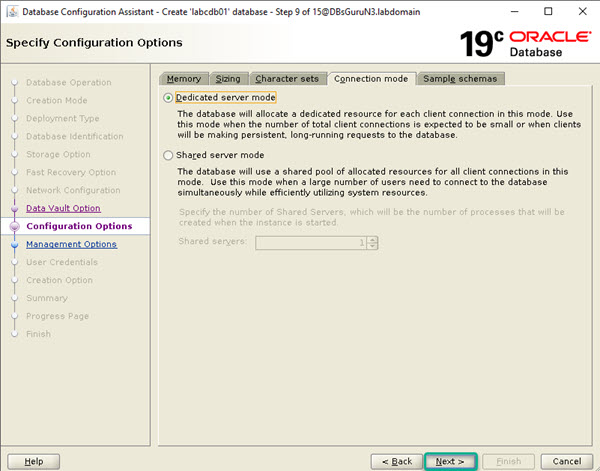
Connection Mode: Select option-01 Dedicated server mode.
Sample Schema: Check the box Add sample schemas if you require else you may skip it and click on Next.
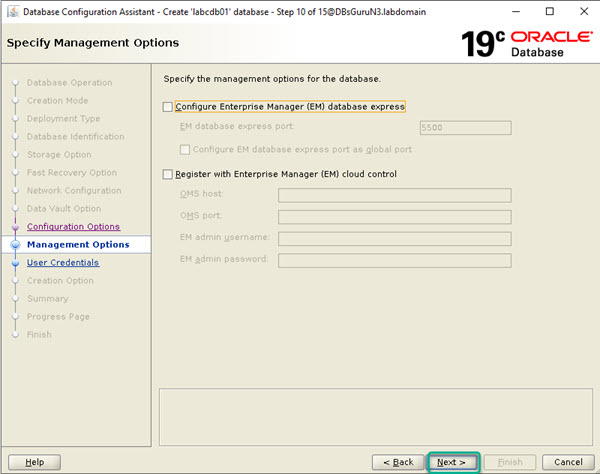
3.12. Management Options: Remain to uncheck the box for Enterprise Manager and click on Next.
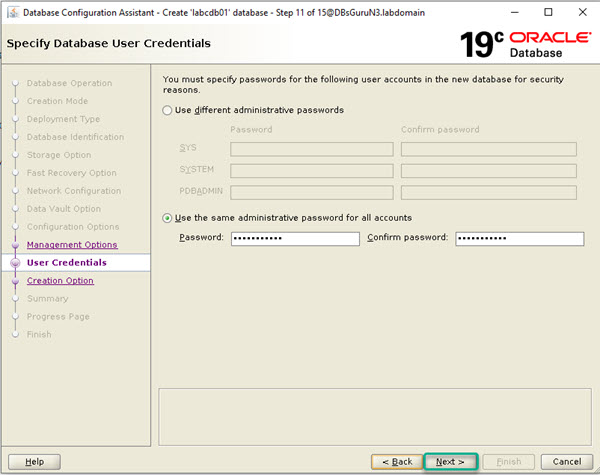
3.13. User Credentials: Pass the value of the password for SYS & SYSTEM and click on Next.
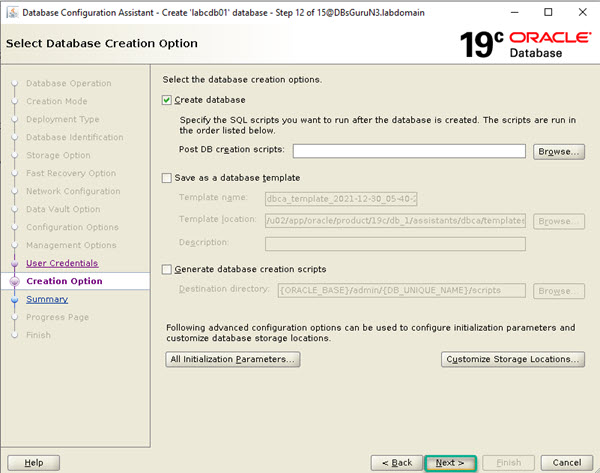
3.14. Creation Options: In this screen, we have options to multiplex control files and redolog files. If you want then click on customize Storage Locations. Now click on Next.
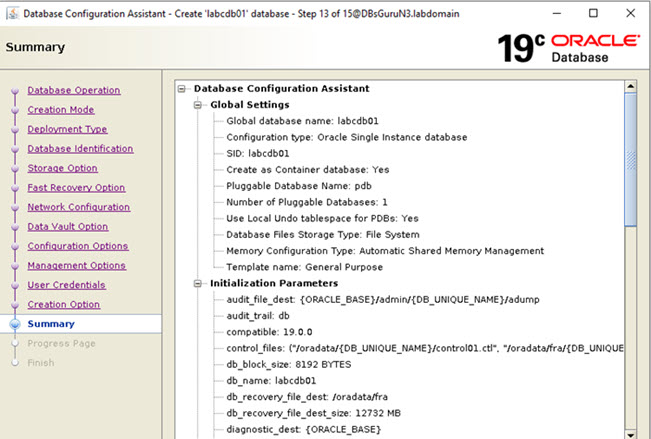
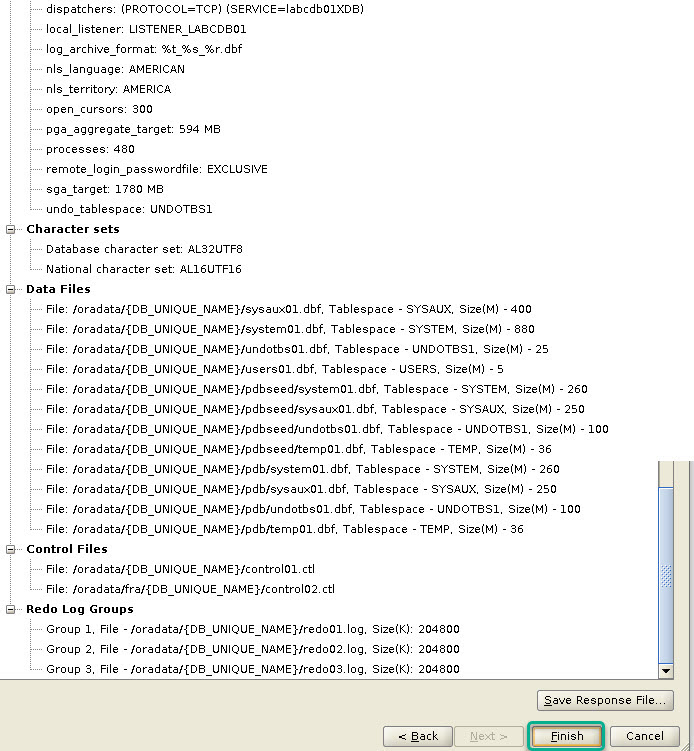
3.15. Summary: This is a final screen to review the summary on the basis of steps 1 to 12 of dbca so review carefully if found anything to change then go back and change the configuration. Once you are ready click on Finish.
3.16. Progress: Take a long breath and closely monitor the progress of database creation along with the database alert log & DBCA log.
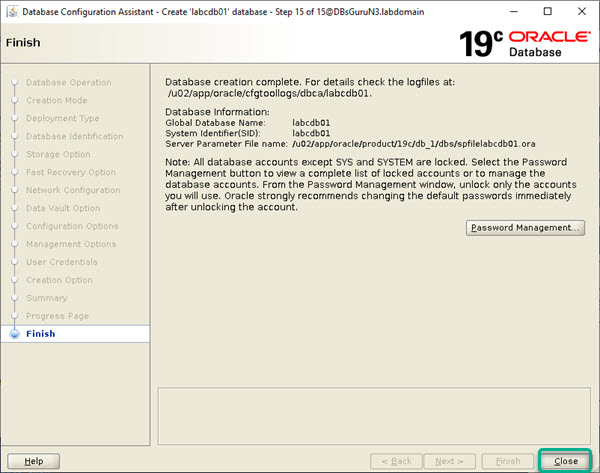
3.17. Finish: Upon successful creation of database LABCDB01, optionally you can click on Password Management to set a new password and unlock the account of sample schemas as required then click on Close.
3.18. Post Validation of database creation: Here we will perform basic validation of the database.
3.18.1: Validate database service along with listener status.
[oracle@DBsGuruN3 ~]$ ps -eaf | grep pmon
oracle     19968       1  0 18:33 ?        00:00:00 ora_pmon_labcdb01
oracle     20422    3898  0 18:35 pts/1    00:00:00 grep --color=auto pmon
[oracle@DBsGuruN3 ~]$ ps -eaf | grep tns
root          48       2  0 16:28 ?        00:00:00 [netns]
oracle     16138       1  0 18:13 ?        00:00:00 /u02/app/oracle/product/19c/db_1/bin/tnslsnr LISTENER -inherit
oracle     20427    3898  0 18:35 pts/1    00:00:00 grep --color=auto tns
[oracle@DBsGuruN3 ~]$ lsnrctl statu

LSNRCTL for Linux: Version 19.0.0.0.0 - Production on 30-DEC-2021 18:36:05

Copyright (c) 1991, 2019, Oracle.  All rights reserved.

Connecting to (DESCRIPTION=(ADDRESS=(PROTOCOL=TCP)(HOST=DBsGuruN3.labdomain)(PORT=1521)))
STATUS of the LISTENER
------------------------
Alias                     LISTENER
Version                   TNSLSNR for Linux: Version 19.0.0.0.0 - Production
Start Date                30-DEC-2021 18:13:32
Uptime                    0 days 0 hr. 22 min. 33 sec
Trace Level               off
Security                  ON: Local OS Authentication
SNMP                      OFF
Listener Parameter File   /u02/app/oracle/product/19c/db_1/network/admin/listener.ora
Listener Log File         /u02/app/oracle/diag/tnslsnr/DBsGuruN3/listener/alert/log.xml
Listening Endpoints Summary...
  (DESCRIPTION=(ADDRESS=(PROTOCOL=tcp)(HOST=DBsGuruN3.labdomain)(PORT=1521)))
  (DESCRIPTION=(ADDRESS=(PROTOCOL=ipc)(KEY=EXTPROC1521)))
Services Summary...
Service "86b637b62fdf7a65e053f706e80a27ca" has 1 instance(s).
  Instance "labcdb01", status READY, has 1 handler(s) for this service...
Service "d45daedf2fb84e72e0536b38a8c0cd9d" has 1 instance(s).
  Instance "labcdb01", status READY, has 1 handler(s) for this service...
Service "labcdb01" has 1 instance(s).
  Instance "labcdb01", status READY, has 1 handler(s) for this service...
Service "labcdb01XDB" has 1 instance(s).
  Instance "labcdb01", status READY, has 1 handler(s) for this service...
Service "pdb" has 1 instance(s).
  Instance "labcdb01", status READY, has 1 handler(s) for this service...
The command completed successfully
3.18.2: Validate database startup time, click here to get SQL command for startup time validation.
[oracle@DBsGuruN3 ~]$ . oraenv
ORACLE_SID = [oracle] ? labcdb01
The Oracle base has been changed from /home/oracle to /u02/app/oracle
[oracle@DBsGuruN3 ~]$ sqlplus / as sysdba

SQL*Plus: Release 19.0.0.0.0 - Production on Thu Dec 30 18:36:41 2021
Version 19.3.0.0.0

Copyright (c) 1982, 2019, Oracle.  All rights reserved.


Connected to:
Oracle Database 19c Enterprise Edition Release 19.0.0.0.0 - Production
Version 19.3.0.0.0

SQL> @startuptime.sql

'HOSTNAME:'||HOST_NAME
---------------------------------------------------------------------------
'INSTANCENAME:'||INSTANCE_NAME
--------------------------------
STIME
------------------------------------------------------------
SERVER_UPTIME
------------------------------------------------------------
HOSTNAME : DBsGuruN3.labdomain
INSTANCE NAME : labcdb01
STARTED AT : 30-DEC-2021 18:33:31
UPTIME : 0 DAYS(S) 0 HOUR(S) 4 MINUTE(S) 28 SECOND(S)


SQL>
3.18.3: Validate all physical files, click here to get SQL command for validation of all database files.
SQL> show pdbs

    CON_ID CON_NAME                       OPEN MODE  RESTRICTED
---------- ------------------------------ ---------- ----------
         2 PDB$SEED                       READ ONLY  NO
         3 PDB
SQL> show con_name

CON_NAME
------------------------------
CDB$ROOT
SQL> @cdb_pdb_physical_files.sql

NAME
------------------------------------------------------------
/oradata/LABCDB01/pdb/sysaux01.dbf
/oradata/LABCDB01/pdb/undotbs01.dbf
/oradata/LABCDB01/redo01.log
/oradata/LABCDB01/system01.dbf
/oradata/LABCDB01/temp01.dbf
/oradata/fra/LABCDB01/control02.ctl
/oradata/LABCDB01/control01.ctl
/oradata/LABCDB01/pdb/system01.dbf
/oradata/LABCDB01/pdb/temp01.dbf
/oradata/LABCDB01/pdb/users01.dbf
/oradata/LABCDB01/redo02.log
/oradata/LABCDB01/redo03.log
/oradata/LABCDB01/sysaux01.dbf
/oradata/LABCDB01/undotbs01.dbf
/oradata/LABCDB01/users01.dbf

15 rows selected.
Click here for Step by step silent installation of Oracle 19c on Linux 7
Click here for Step by Step manually creation of an Oracle 19c Database on Linux 7\
Click here for Oracle Database 19c RPM Installation On Oracle Linux 7
This document is just for learning purpose and always validate in the LAB environment first before applying in the LIVE environment.
Hope so you like this article!
Please share your valuable feedback/comments/subscribe and follow us below and don’t forget to click on the bell icon to get the most recent update. Click here to understand more about our pursuit.
Related Articles
- Oracle Critical Database Patch ID for January 2025 along with enabled Download Link
- Oracle Critical Database Patch ID for October 2024 along with enabled Download Link
- Oracle Critical Database Patch ID for July 2024 along with enabled Download Link
- Oracle Critical Database Patch ID for April 2024 along with enabled Download Link
- Oracle Critical Database Patch ID for April 2023 along with enabled Download Link
![]()