Step by Step installation of Oracle Client
As most of us already know oracle client is installed on the application server to execute SQL command or compile script related to the application.
Below is the step by step installation of Oracle client on UNIX.
Step1: Created users and group
Below we are creating groups and user.
[root@DBsGuru01 ~]# groupadd dba
[root@DBsGuru01 ~]# useradd oracle
[root@DBsGuru01 ~]# passwd oracle
Changing password for user oracle
New password: Retype new password:
Step2: Create required directories and Changing ownership
Below are the directories required for installation. it is optional you can use any directories where you want to install oracle client binary.
[root@DBsGuru01 tmp]# mkdir -p /u01/app/oracle
[root@DBsGuru01 tmp]# mkdir -p /u01/app/oraInventory
[root@DBsGuru01 tmp]# chown -R oracle:dba /u01
[root@DBsGuru01 tmp]# chown -R oracle:dba /u02
Step3: Switch user oracle, go to a binary location and unzip Oracle Client binary
Here oracle client binary present in /u01/software/client in your case it would be in a different locations. after unzipping the client binary, we get the below output.
[oracle@DBsGuru01 client]$ unzip V839967-01.zip
[oracle@DBsGuru01 client]$ pwd
/u01/software/client
[oracle@DBsGuru01 client]$ ls -lrt
-rwxrwxr-x  1 oracle dba  500 Feb  6  2013 welcome.html
-rwxr-xr-x  1 oracle dba 8775 Jan 26  2017 runInstaller
drwxr-xr-x  4 oracle dba  234 Jan 26  2017 install
drwxrwxr-x  2 oracle dba   49 Jan 26  2017 response
drwxr-xr-x 14 oracle dba 4096 Jan 26  2017 stage
step 4: Now start Installation of Oracle Client
After executing runInstaller, it will check for some pre-requisite then it will direct to the installation page.
[oracle@DBsGuru01 admin]$ ./runInstaller
Starting Oracle Universal Installer...
Checking Temp space: must be greater than 415 MB.   Actual 20429 MB    Passed
Checking swap space: must be greater than 150 MB.   Actual 24574 MB    Passed
Checking monitor: must be configured to display at least 256 colors.    Actual 16777216    Passed

Preparing to launch Oracle Universal Installer from /tmp/OraInstall2020-10-12_10-59-13AM. Please wait ...$
Follow below screenshots to further steps:
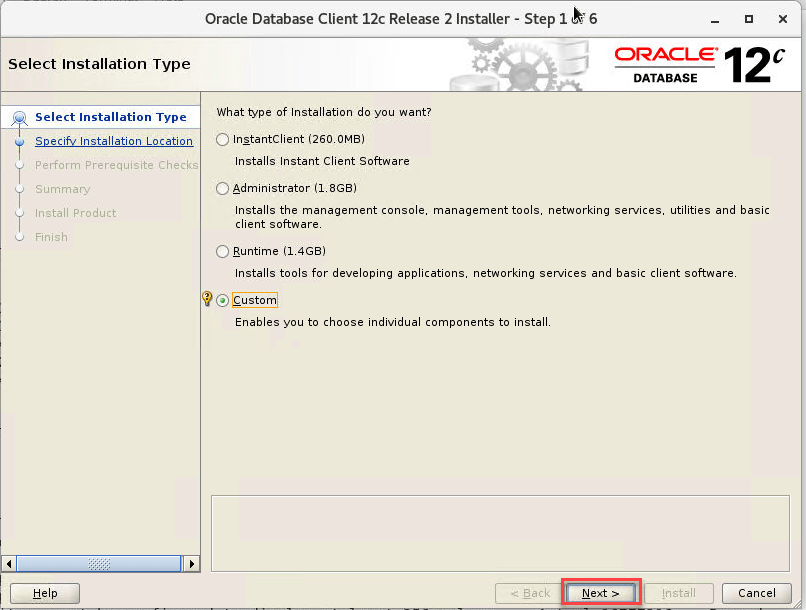
Select option Administrator or custom as required
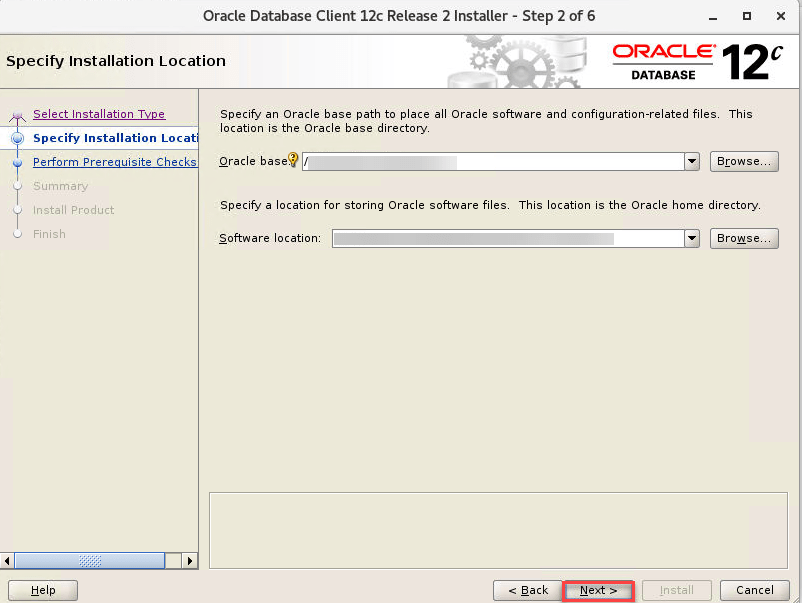
Put here Oracle Base & Software location as we created in step2.
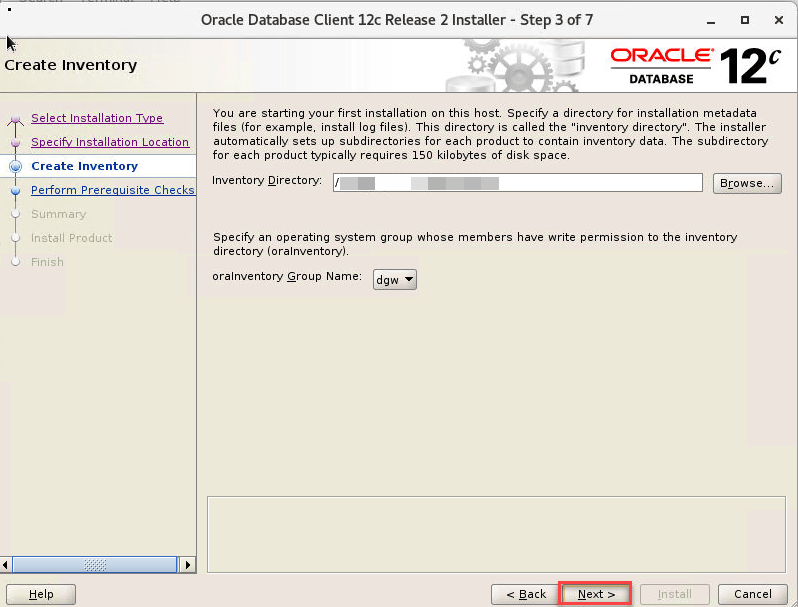
In this section put Inventory location and select group for the same.
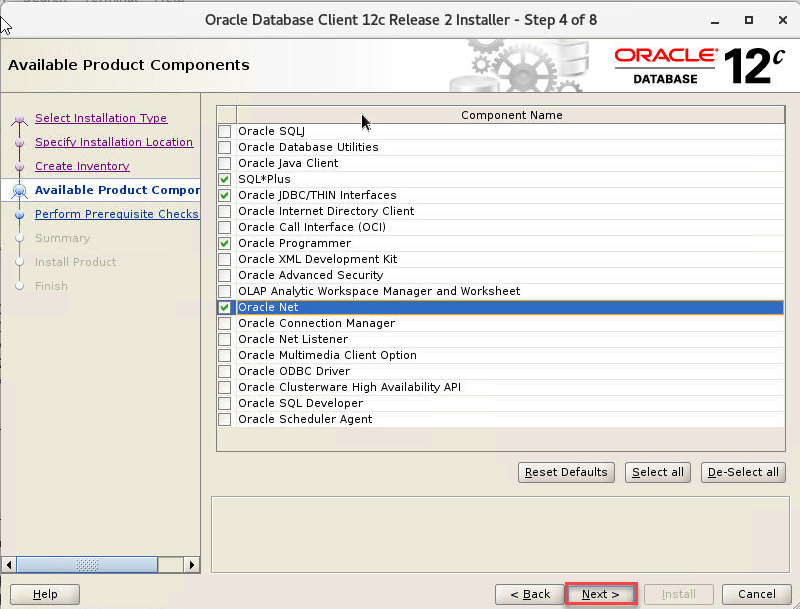
Since we have opted here custom so click on the check box for required components.
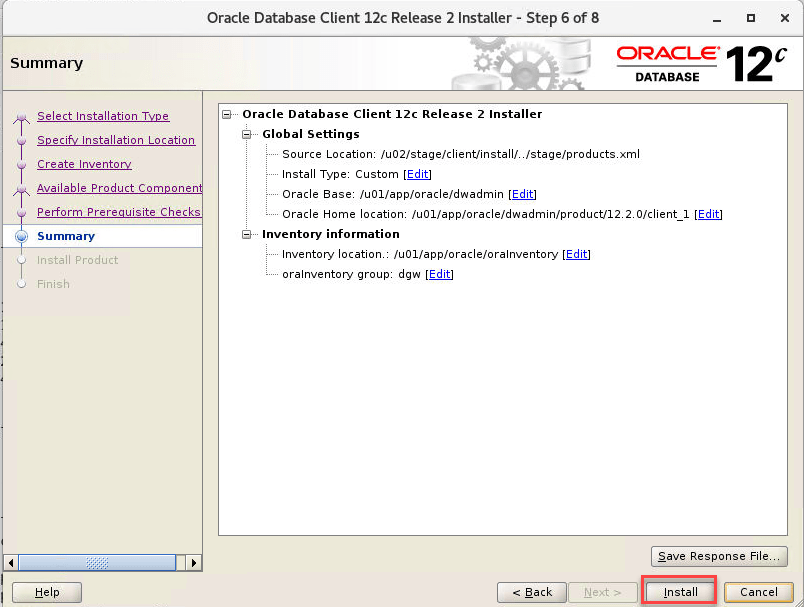
Here it shows a summary before proceeding with client installation.
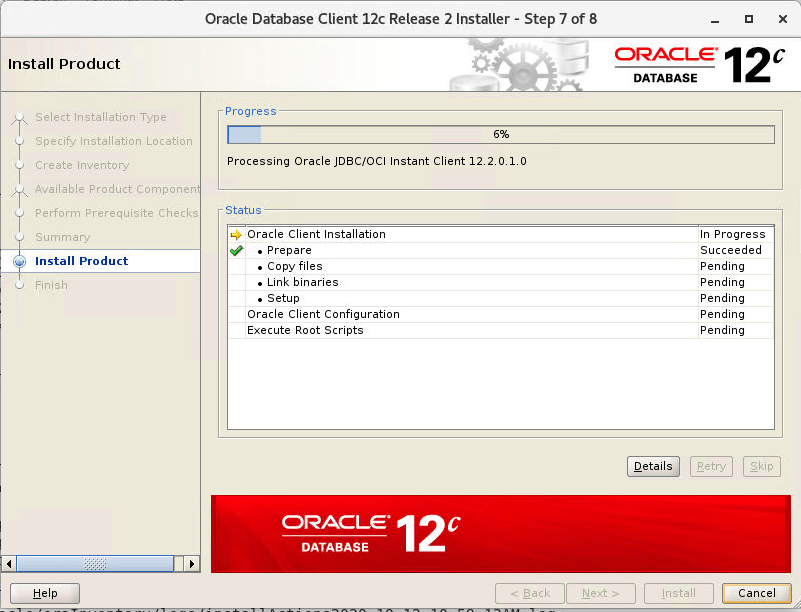
In this section, we can see the completion progress of client installation.
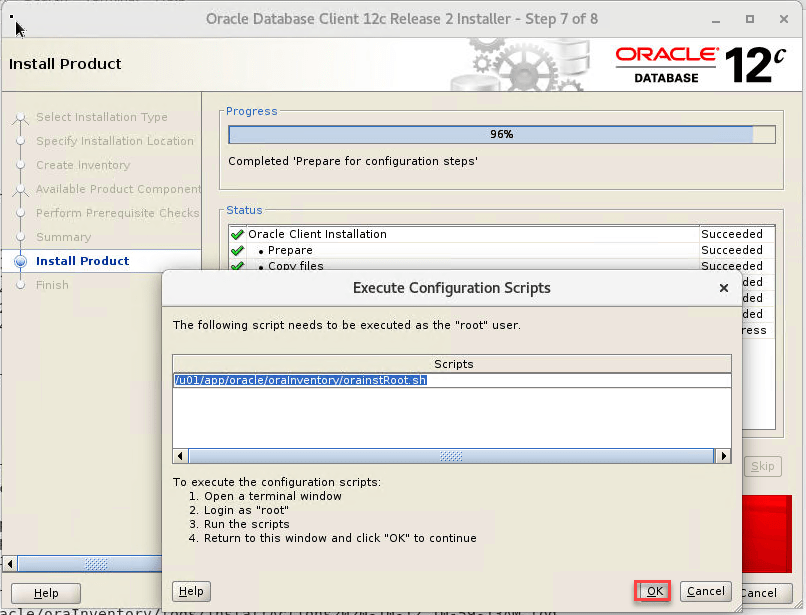
Now we have to execute orainstRoot.sh as root user either execute by own if have privileges or ask Unix admin to execute it and click on OK once successful execution.
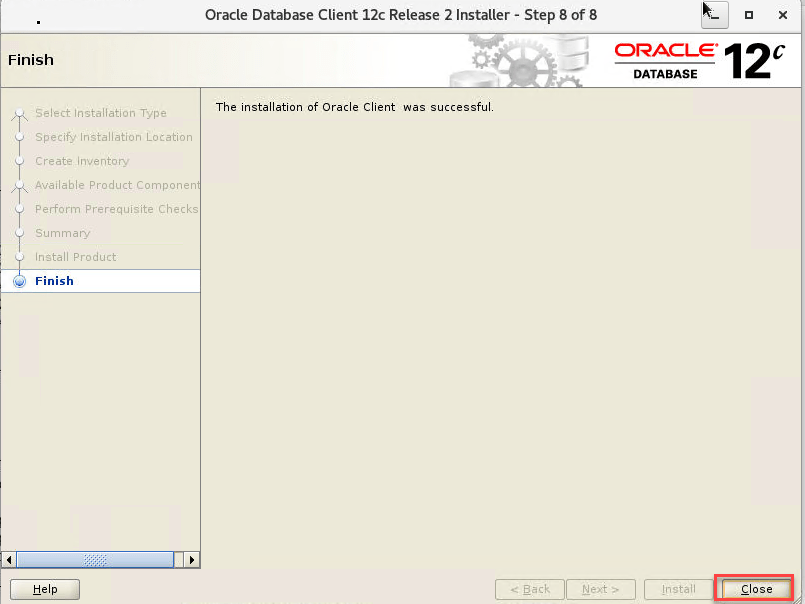
Congratulation Oracle client installation is successful.
Step5: Execute orainstRoot.sh from root user.
In my environment, we have root access to execute orainstRoot.sh, so we have executed as mentioned earlier.
Below is the output of OrainstRoot.sh
[root@DBsGuru01 ~]# /u01/app/oracle/oraInventory/orainstRoot.sh
Changing permissions of /u01/app/oracle/oraInventory.
Adding read,write permissions for group.
Removing read,write,execute permissions for world.
Changing groupname of /u01/app/oracle/oraInventory to dba.
The execution of the script is complete.
Step6: Add TNS entry.
Add tns entry into tnsname.ora on oracle client server and validate Tnsping command
[oracle@DBsGuru01 admin]$ pwd
/u01/oracle/base/product/12.1.0/client_1/network/admin
TEST1 =
(DESCRIPTION =
(ADDRESS_LIST =
(ADDRESS = (PROTOCOL = TCP)(HOST =DBsguru-scan)(PORT = 1521))
)
(CONNECT_DATA =
(SERVER = DEDICATED)
(SERVICE_NAME = TEST1)
)
)
Check tnsping status from a remote server(Oracle client-server)
[oracle@DBsGuru01 admin]$ tnsping test1

TNS Ping Utility for Linux: Version 12.1.0.2.0 - Production on 14-OCT-2020 13:37:06

Copyright (c) 1997, 2014, Oracle. All rights reserved.

Used parameter files:
/u01/oracle/base/product/12.1.0/client_1/network/admin/sqlnet.ora

Used TNSNAMES adapter to resolve the alias
Attempting to contact (DESCRIPTION = (ADDRESS_LIST = (ADDRESS = (PROTOCOL = TCP)(HOST =DBsguru-scan)(PORT = 1521))) (CONNECT_DATA = (SERVER = DEDICATED) (SERVICE_NAME = TEST1)))
OK (0 msec)
Step6: Test one remote connection from the client machine where we have a newly installed Oracle client.
Below is the test connection which we made from the remote server where we installed oracle client.
SQL*Plus: Release 12.1.0.2.0 Production on Thu Oct 15 08:56:32 2020

Copyright (c) 1982, 2014, Oracle.  All rights reserved.

Enter user-name: demouser@test1
Enter password:
Last Successful login time: Wed Oct 14 2020 17:47:52 -04:00

Connected to:
Oracle Database 12c Enterprise Edition Release 12.2.0.1.0 - 64bit Production

SQL> select host_name, LOGINS,INSTANCE_NAME,ACTIVE_STATE,DATABASE_STATUS,to_char(startup_time,'dd-mon-yyyy hh24:mi:ss') startup_time from gv$instance;

HOST_NAME                                          LOGINS     INSTANCE_NAME    ACTIVE_ST DATABASE_STATUS   STARTUP_TIME
-------------------------------------------------- ---------- ---------------- --------- ----------------- -----------------------------
rvccdrdbadm01.raritanval.edu                       ALLOWED    TEST1          NORMAL    ACTIVE            15-oct-2020 10:24:09
rvccdrdbadm02.raritanval.edu                       ALLOWED    TEST2          NORMAL    ACTIVE            15-oct-2020 10:24:09
This document is just for learning purpose and always validate in the LAB environment first before applying in the LIVE environment.
Hope so you like this article!
Please share your valuable feedback/comments/subscribe and follow us below and don’t forget to click on the bell icon to get the most recent update. Click here to know more about our pursuit.
![]()