How To Load PostgreSQL Sample Database
In this tutorial, we will see How to load the PostgreSQL sample database into the PostgreSQL server. In this demonstration, we will see two methods to restore:
1). Using pg_restore command utility
2). Using pgAdmin Graphics Tool
Load the sample database using psql (pg_restore) tool
Step 1. Download sample database: Use the OS wget command to download the sample DB dump file to the Server.
[root@test-machine02 u01]#
[root@test-machine02 u01]# wget https://sp.postgresqltutorial.com/wp-content/uploads/2019/05/dvdrental.zip
--2021-05-02 14:06:35--  https://sp.postgresqltutorial.com/wp-content/uploads/2019/05/dvdrental.zip
Resolving sp.postgresqltutorial.com (sp.postgresqltutorial.com)... 151.139.128.11
Connecting to sp.postgresqltutorial.com (sp.postgresqltutorial.com)|151.139.128.11|:443... connected.
HTTP request sent, awaiting response... 200 OK
Length: 550906 (538K) [application/zip]
Saving to: âdvdrental.zipâ

100%[====================================================================================================================================================>] 550,906      980KB/s   in 0.5s

2021-05-02 14:06:36 (980 KB/s) - âdvdrental.zipâ saved [550906/550906]

[root@test-machine02 u01]# ls -ltr
total 548
-rw-r--r--.  1 root  root  550906 May 12  2019 dvdrental.zip
Step 2. Unzip Sample Database Dump File: Use the OS command unzip to extract the downloaded sample DB dump file.
[root@test-machine02 u01]# unzip dvdrental.zip
Archive:  dvdrental.zip
  inflating: dvdrental.tar
[root@test-machine02 u01]#


[root@test-machine02 u01]# ls -ltr
total 3320
-rw-r--r--.  1 root  root   550906 May 12  2019 dvdrental.zip
-rw-r--r--.  1 root  root  2835456 May 12  2019 dvdrental.tar
Step 3. Create Database: We will create an empty DB structure called dvdrental to perform restore.
,5,[root@test-machine02 u01]#
[root@test-machine02 u01]# su - postgres
Last login: Sun May  2 14:06:21 +03 2021 on pts/0
-bash-4.2$
-bash-4.2$ psql
psql (13.2)
Type "help" for help.

postgres=#
postgres=# create database dvdrental;
CREATE DATABASE
postgres=#
postgres=# \q
-bash-4.2$
Step 4. Restore Dump File: Use utility pg_restore to perform restore from the downloaded dump file.
-bash-4.2$ cd /u01
-bash-4.2$
-bash-4.2$ pwd
/u01
-bash-4.2$ pg_restore --dbname=dvdrental --verbose dvdrental.tar
pg_restore: connecting to database for restore
pg_restore: creating TYPE "public.mpaa_rating"
pg_restore: creating DOMAIN "public.year"
pg_restore: creating FUNCTION "public._group_concat(text, text)"
pg_restore: creating FUNCTION "public.film_in_stock(integer, integer)"
pg_restore: creating FUNCTION "public.film_not_in_stock(integer, integer)"
pg_restore: creating FUNCTION "public.get_customer_balance(integer, timestamp without time zone)"
pg_restore: creating FK CONSTRAINT "public.city fk_city"
pg_restore: creating FK CONSTRAINT "public.inventory inventory_film_id_fkey"
pg_restore: creating FK CONSTRAINT "public.payment payment_customer_id_fkey"
pg_restore: creating FK CONSTRAINT "public.payment payment_rental_id_fkey"
pg_restore: creating FK CONSTRAINT "public.payment payment_staff_id_fkey"
pg_restore: creating FK CONSTRAINT "public.rental rental_customer_id_fkey"
pg_restore: creating FK CONSTRAINT "public.rental rental_inventory_id_fkey"
pg_restore: creating FK CONSTRAINT "public.rental rental_staff_id_key"
pg_restore: creating FK CONSTRAINT "public.staff staff_address_id_fkey"
pg_restore: creating FK CONSTRAINT "public.store store_address_id_fkey"
pg_restore: creating FK CONSTRAINT "public.store store_manager_staff_id_fkey"
-bash-4.2$
Step 5. Validate Imported Data: Login to psql and connect to DB dvdrental using \c connection option, You can list tables from \dt+ command.
[root@test-machine02 u01]# su - postgres
Last login: Sun May  2 14:06:21 +03 2021 on pts/0
-bash-4.2$
-bash-4.2$ psql
psql (13.2)
Type "help" for help.

postgres=#
postgres=# \c dvdrental
You are now connected to database "dvdrental" as user "postgres".
dvdrental=#
dvdrental=# \conninfo
You are connected to database "dvdrental" as user "postgres" via socket in "/var/run/postgresql" at port "5432".
dvdrental=#


dvdrental=#
dvdrental=# \dt+
                                 List of relations
 Schema |     Name      | Type  |  Owner   | Persistence |    Size    | Description
--------+---------------+-------+----------+-------------+------------+-------------
 public | actor         | table | postgres | permanent   | 40 kB      |
 public | address       | table | postgres | permanent   | 88 kB      |
 public | category      | table | postgres | permanent   | 8192 bytes |
 public | city          | table | postgres | permanent   | 64 kB      |
 public | country       | table | postgres | permanent   | 8192 bytes |
 public | customer      | table | postgres | permanent   | 96 kB      |
 public | film          | table | postgres | permanent   | 464 kB     |
 public | film_actor    | table | postgres | permanent   | 272 kB     |
 public | film_category | table | postgres | permanent   | 72 kB      |
 public | inventory     | table | postgres | permanent   | 232 kB     |
 public | language      | table | postgres | permanent   | 8192 bytes |
 public | payment       | table | postgres | permanent   | 896 kB     |
 public | rental        | table | postgres | permanent   | 1232 kB    |
 public | staff         | table | postgres | permanent   | 16 kB      |
 public | store         | table | postgres | permanent   | 8192 bytes |
(15 rows)

dvdrental=#
Load the sample database using pgAdmin tool
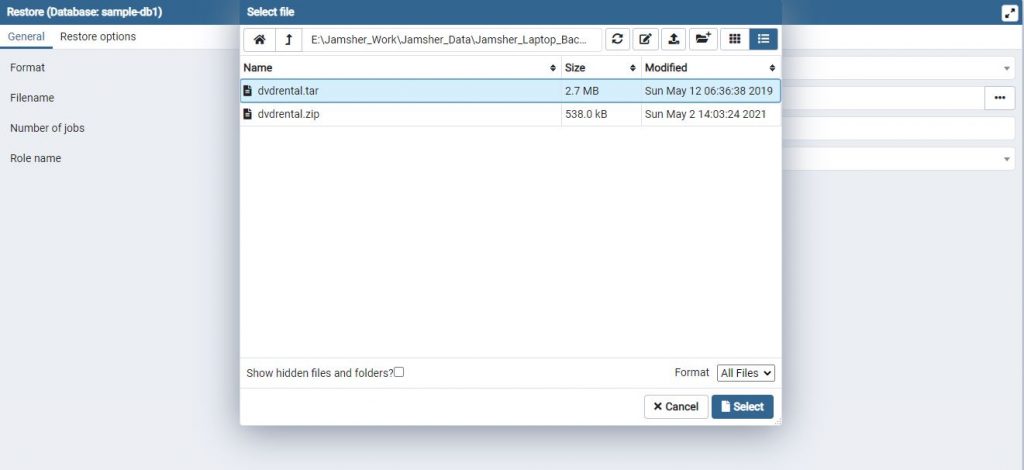
Step 1. Download and Unzip Sample Database Dump file: Click here to download Sample Database and extract using winrar for unzip operation.
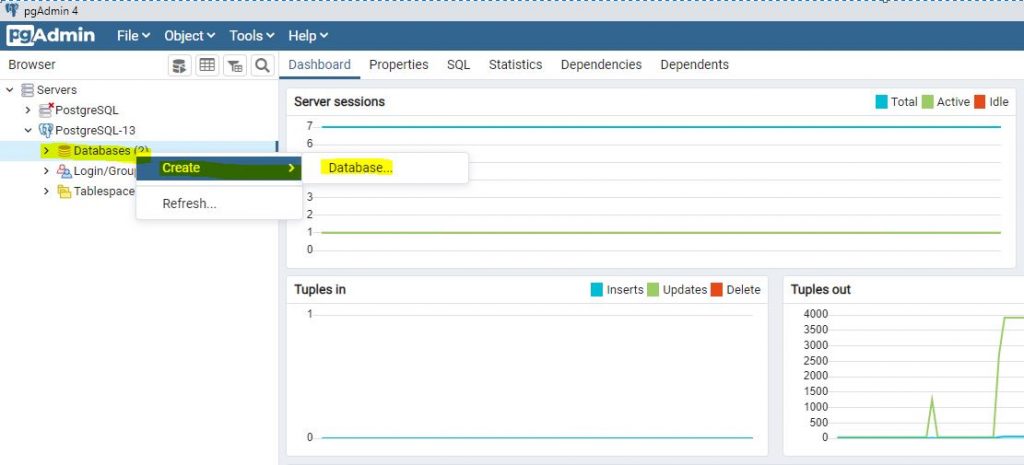
Step 2. Create Sample Database: Launch the pgAdmin tool and connect to the PostgreSQL server. Right-click the Databases and select the Create > Database menu option. Enter the database name sample-db1 and click the Save button.
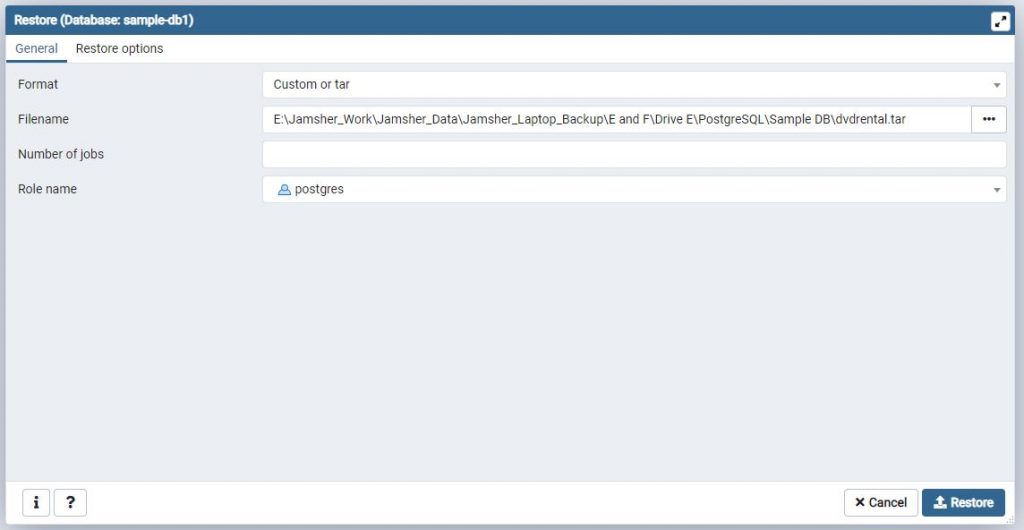
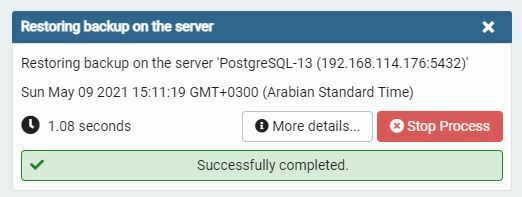
Step 3. Restore Dump File: Right-click on the sample-db1 database and choose Restore… menu item to restore the database from the downloaded sample database dump file.

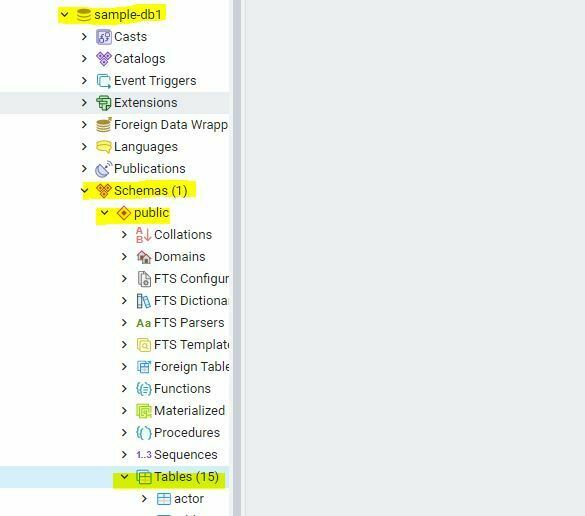
Step 4. Validate Import: Open the sample-db1 database from object browser panel, you will find tables in the public schema.
Click here to know more about Install PostgreSQL 13 on Linux Using YUM Command
Click here to know more about How to Install pgAdmin (Graphical Interface tool) on Windows 10 In PostgreSQL
This document is just for learning purpose and always validate in the LAB environment first before applying in the LIVE environment.
Hope so you like this article!
Please share your valuable feedback/comments/subscribe and follow us below and don’t forget to click on the bell icon to get the most recent update. Click here to understand more about our pursuit.
Related Articles
- Access the MSSQL database from PostgreSQL using TDS Foreign Data Wrapper (TDS_FDW)
- Access MySql database from PostgreSQL using MySQL Foreign Data Wrapper (MYSQL_FDW)
- Configure and monitor using pg_profile in PostgreSQL
- Monitor PostgreSQL Cluster using pgCenter
- Install and Configure pg_repack in PostgreSQL
![]()