Upgrade Oracle Database from 12c to 19c using AutoUpgrade utility

Upgrading a database is always a big task for DBAs in this world but this time Oracle introduces a new feature in 19c for an upgrade which is called “AutoUpgrade Utility” where we will upgrade a database from version 12c to 19c.
Supported version for upgrade
Steps for Upgrade
- Install 19c database binaries.
- Download the latest autoupgrade.jar file from Oracle supports MOS Document 2485457.1.
- Create a Config file for the upgrade process.
- Analyze the database using a config file created.
- Deploy the actual upgrade process.
Let us start the Practical
- Install Oracle 19c database Binaries:
- Download the latest autoupgrade.jar file and replace it with the default one as below

After replacing let’s confirm the version as below image.

For an upgrade, the java version should be 1.8 which is available in “ORACLE_HOME/jdk/bin” so make sure match to the minimum required version of java.

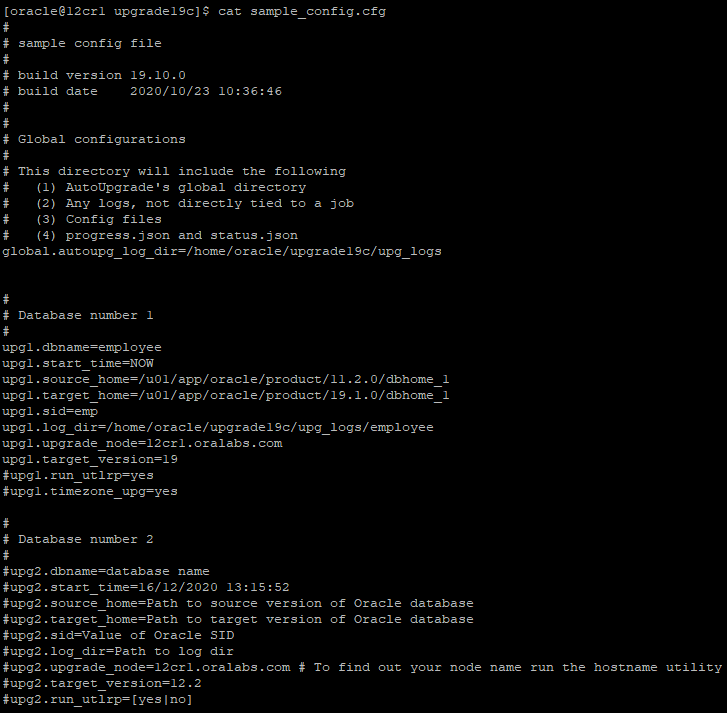
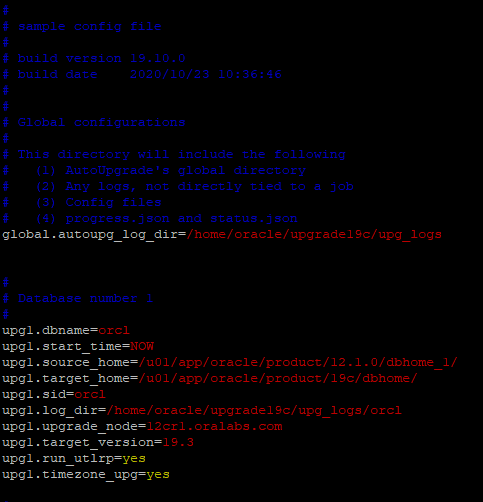
- Create the Config file for the DB upgrade as below.

Before creating a config file let’s create a directory which holds all the log files of the upgrade process.
- Time for database analysis, let’s do it using the below command:

From the above image, we have done the ANALYZE of the source database, now time to check the log files. You can find the log files at the location shown in the below image.

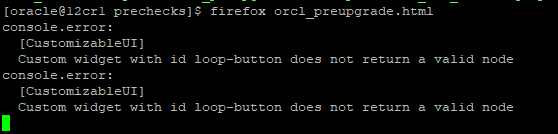
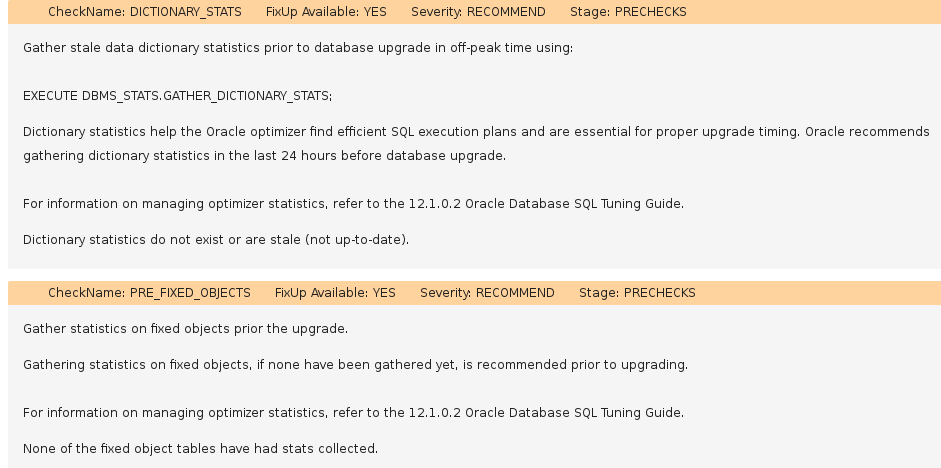
Now open the HTML file using a browser (firefox) as below and read the file.
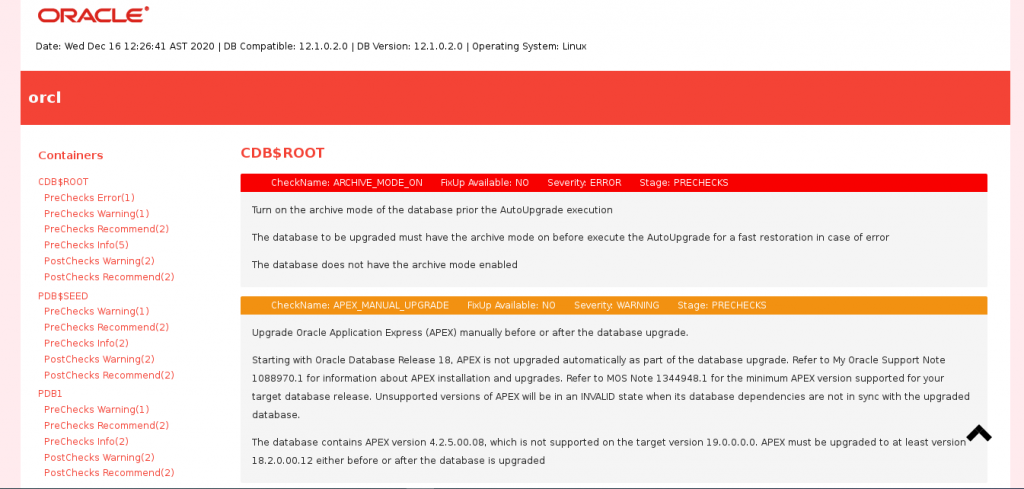
From the above HTML, it shows 1 error which is about the archive log disable.
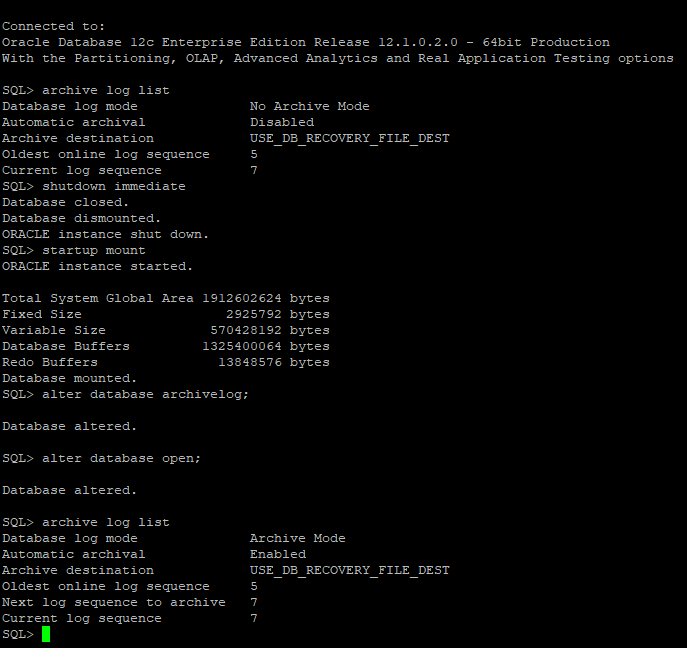
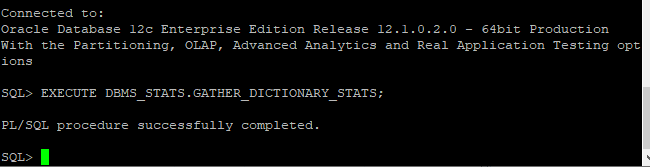
Enable the archive log mode followed by below image along with gather statistics.
- Time for the actual upgrade (DEPLOY mode)
Now we are ready for the actual upgrade of the database so let’s do it.
$ORACLE_HOME/jdk/bin/java -jar $ORACLE_HOME/rdbms/admin/autoupgrade.jar -config conifgfilename -mode DEPLOY
set the environment to 19c oracle home and run the upgrade in deploy mode before running the upgrade make sure the PDB is on read-write mode otherwise, the upgrade will fail as below:

let’s run the upgrade after the environment set:

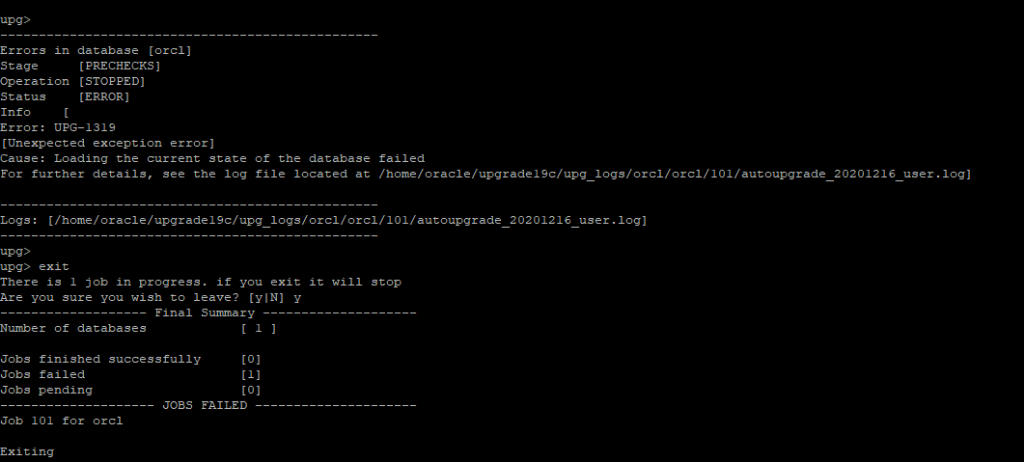
My upgrade got failed at the PRECHECKS let’s analyze the log file to find out root cause of this failure.

From the above log file, I found the error for MIN_RECOVERY_AREA_SIZE so I increase the db_recovery_file_dest_size which solved the above issue, and restart the upgrade process again.
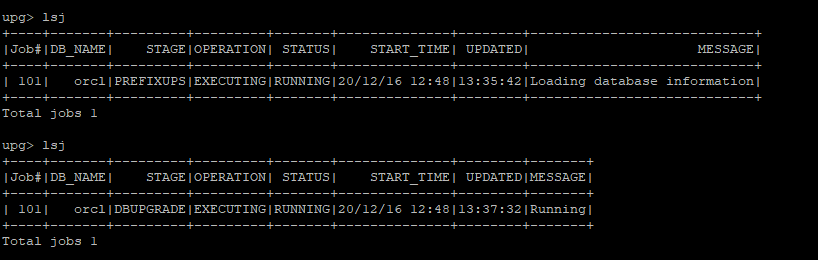
Continued monitor…….
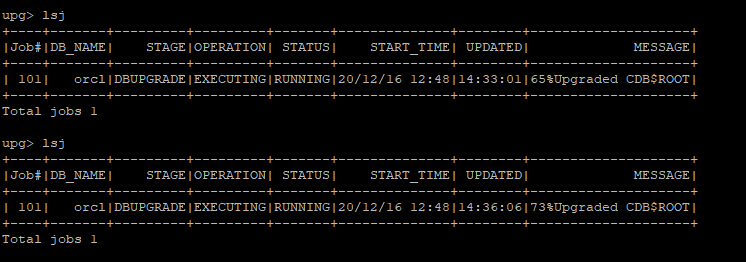
Continued monitor…….
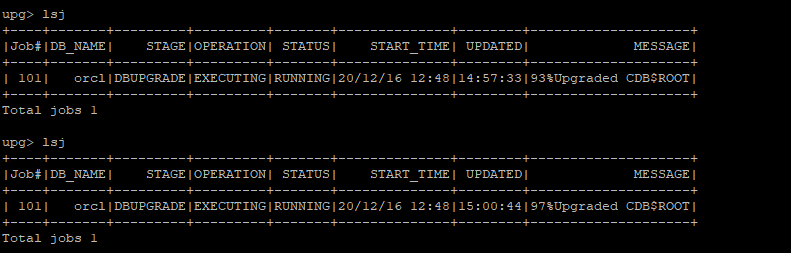
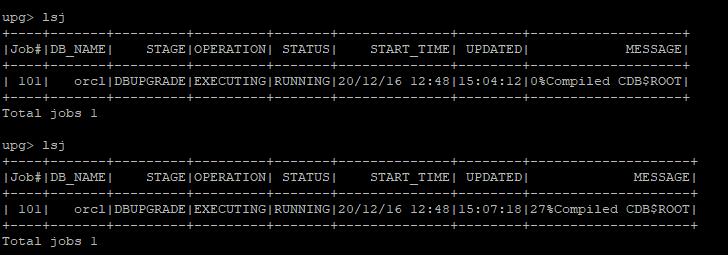
After Completing the upgrade of CDB$ROOT it will compile the CDB$ROOT, refer below image..
Now it is started the PDB$SEED and pluggable database upgrade.

Continued monitor…….
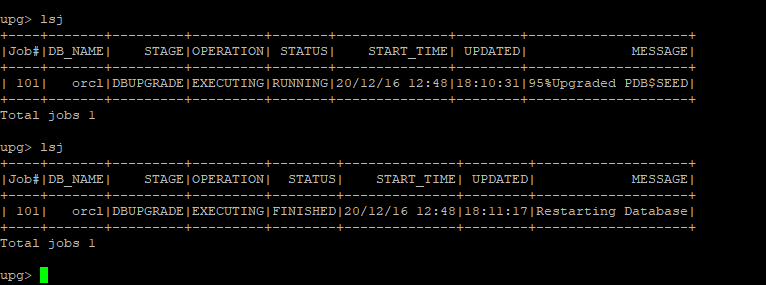
After the upgrade, it starts POSTCHECKS as shown in the below image.

Continued monitor…….
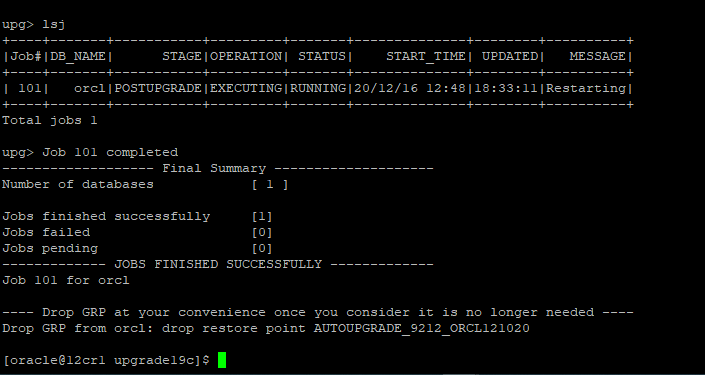
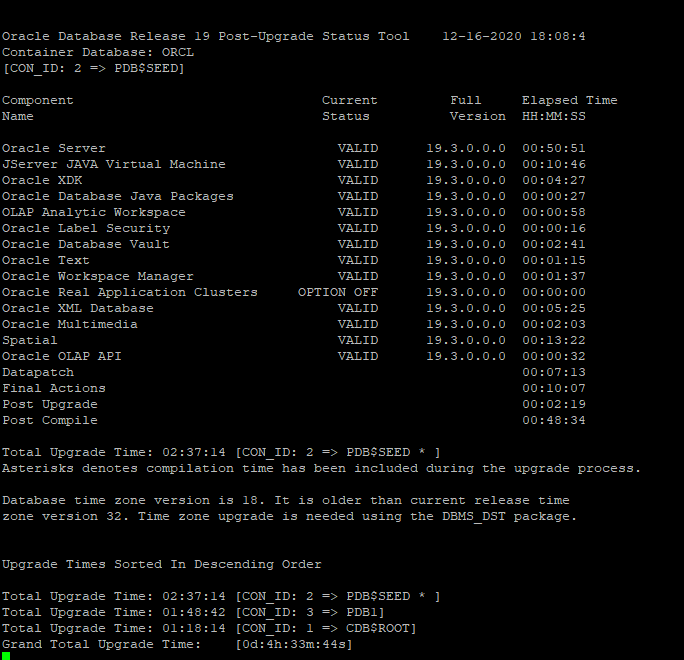
Now lets move to check the logfiles.
The database has been successfully upgraded using the autoupgrade utility and it took approx 4.5 hours.
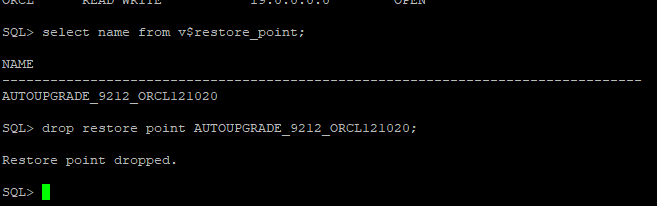
Now we will validate the time version after upgrades and drop the restored point if any.
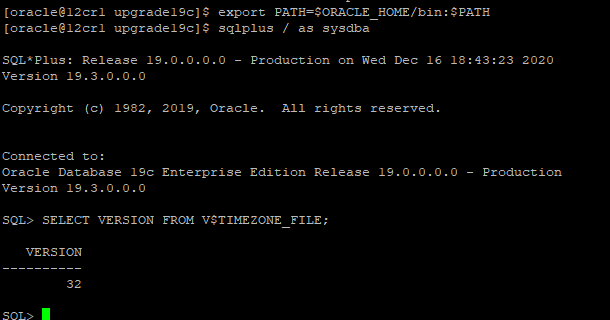

We have checked the status of the database and drop the GRP successfully.
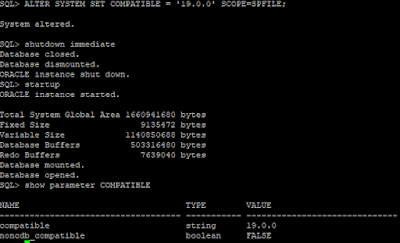
If you want to change the compatible parameter after the database upgrade, this is required to utilize all features version 19c. So accordingly change it from version 12.1.0.2 to 19.0.0 as shown below:


The above image describes you regarding the commands to use while doing an upgrade using the autoupgrade utility.
This document is just for learning purpose and always validate in the LAB environment first before applying in the LIVE environment.
Hope so you like this article!
Please share your valuable feedback/comments/subscribe and follow us below and don’t forget to click on the bell icon to get the most recent update. Click here to understand more about our pursuit.
Recent articles
- Oracle Critical Database Patch ID for April 2026 along with enabled Download Link
- Oracle Critical Database Patch ID for July 2025 along with enabled Download Link
- Oracle Critical Database Patch ID for April 2025 along with enabled Download Link
- Oracle Critical Database Patch ID for January 2025 along with enabled Download Link
- Oracle Critical Database Patch ID for October 2024 along with enabled Download Link
![]()
Thanks for sharing this post.
Thanks, Sardar for the review and feedback.
Regards,
Team DBsGuru.
Great post.
Thanks for the review and feedback.
Regards,
Team DBsGuru.
Hello,
nice article. I have question, where did you get log for total upgrade time etc.?
Thank you
Thanks for reviewing! You can mention the log location in the config file. Refer to the below image.
IMAGE1
IMAGE2
You can also review the below article for the same AUTOUPGRADE.
https://dbsguru.com/steps-to-upgrade-grid-infra-standalone-gi-and-oracle-database-from-12-2-to-19-14/
Thanks.
Team DBsGuru